In
this article, I am going to discuss how to deploy ASP.NET Core Web API application in Azure App
Service. Here, we will discuss about below points:
- How to create App Service in Azure?
- How to deploy ASP.NET Core Web API in Azure App
Service?
How to create App Service in Azure?
Let me first give a brief introduction of Azure App Service. Azure
App Service is an HTTP-based service for hosting web applications, REST APIs,
and mobile back ends. We can used it to deploy applications built in .NET, .NET
Core, Java, Ruby, Node.js, PHP, or Python. It is platform as a service provided
by the Microsoft. We don't need to have worry about setup things on machine,
because everything is made ready by Microsoft itself.
Based
on the technology we have used to build application we have to configure that
on creation of App Service. We will do it in this article.
If
you haven't seen my previous article then please go through that once because
we are going to use the same application for deployment.
Step1: Login to Azure Portal
Step2: Search for App Services in top search bar and click on App Services under Services section
Step3: Click on Create button in App
Services page
Step4:
Select
your Subscription from available
options in dropdown.
Select
a Resource Group from available
resource groups or Create New.
Provide
a unique domain name for your Web API. For this demo I have given name webapidemo1990
Select
Code radio button under Publish section
From
Runtime stack dropdown select .NET 6(LTS). We are selecting this
because we developed ASP.NET Core Web API in .NET 6. Based on your application
technology and version you can select the relevant option. On selection of .NET
6(LTS), it will automatically select Windows
operating system.
From
Windows Plan section click on Create new button and provide a name
then select Free F1 (Shared
infrastructure) option.
Keep
the rest of settings as it is.
Now
either you can click on Next : Deployment>
button or directly can click on Review +
create button
Once
you done this, Azure will create App Service for you and on successful creation
below screen will be shown:
How to deploy ASP.NET Core Web API in Azure App
Service?
Step1: Go to your ASP.NET Core Web API project and
right click on your project solution file name in Solution Explorer.
Step2: Click on Publish from available options.
Step3: Select Azure option from publish window and click on Next button.
Step4: Select Azure App Service option from publish window and click on Next button.
Step5: It will ask to login on Azure if you haven’t login before. After login select the App Service from
resource group which you had created. Finally click on Finish button.
Step6: Click on Publish button. It will
publish all code to Azure App Service. Once you got Publish succeeded message
you can check it via directly browsing Web API url in browser or through any
rest client tools like postman.
Step7: If you have read my previous article you
already know we were accessing Web API methods by using below URLs.
http://localhost:xxxxx/xyz/{ControllerName}/{ActionName}
But
now these methods will be access by below url.
https://webapidemo1990.azurewebsites.net/xyz/{ControllerName}/{ActionName}
As
per our Web API, below are the URLs for methods we created.
https://webapidemo1990.azurewebsites.net/xyz/test/get
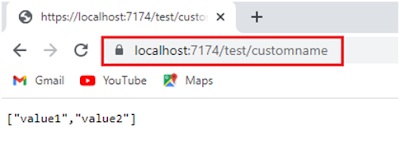
https://webapidemo1990.azurewebsites.net/xyz/test/customname
You
can also verify response by calling Web API methods through postman as below:
Here, in
this article, I try to explain how to deploy ASP.NET Core Web API in Azure App
Service with Examples. I hope this article will help you with your need.
I would like to have your feedback. If you
have any question, comments or suggestions you can comment below or can email
me on my email id.
Thank you for reading this article.


